You no longer need a developer or an expensive system to take bookings on your website. Here's how to create and publish your booking widget in 5 steps, with step-by-step guides for every type of business.
Many tour operators have a great website, yet very little is sold there directly. Travelers come in, look at the photos and prices, and then to book they have to send a WhatsApp message or an email, or leave for an OTA.
Every extra step is a chance for the customer to leave. And every booking that comes through an OTA pays a commission you could avoid.
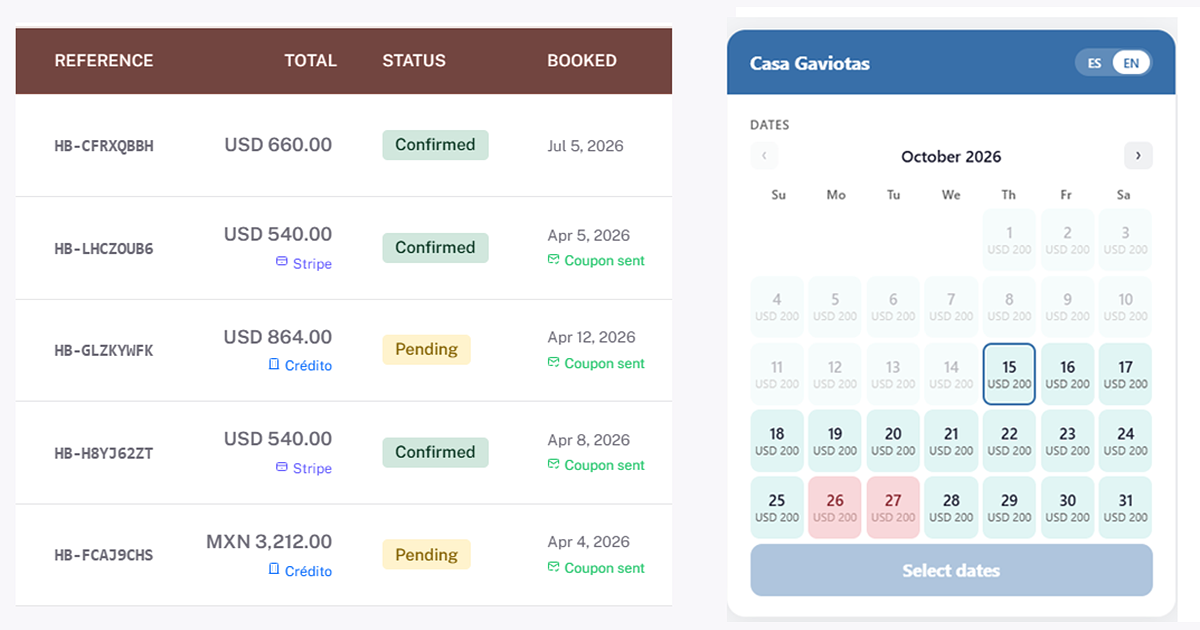
The answer is a booking widget: a small block you paste into your website. It lets the customer pick a date, see availability, pay and get their confirmation without leaving your page.
To make setting it up as easy as possible, we published the Skyrez Help Center: 30 guides with screenshots that take you from creating your account to receiving your first booking.
Step 1: Choose the module that fits your business
Not every business takes bookings the same way. A transfer is priced by zone and vehicle type, a tour by schedule and passenger type, a vacation rental by night and season, and a museum by time slot and capacity.
Skyrez has a module for each case:
- Transportation: airport transfers, by zones and routes.
- Tours: schedules, adult and child rates, and pickup points.
- Hotels: rooms, seasons and meal plans.
- Vacation rentals: date-based requests with seasonal rates.
- Restaurants: table bookings by shift and time.
- Attractions: QR-code tickets, capacity per time slot and validation at the entrance.
If you're not sure which one to use, start with Which module do I need?
Step 2: Set up your service
Each module has its own setup guide covering prices, schedules, seasons, photos and policies. For example:
What you set up here is what customers will see in the widget, so it's worth taking your time with the photos and descriptions.
Step 3: Customize the design
The widget should look like part of your website, not something stuck on top of it. You can adjust its colors, fonts and language to match your brand. We show you how in Customize the widget design.
Step 4: Connect your payments
Connect your Stripe account so every booking is paid from the moment it's made. The money goes straight to your account, not ours. The Connect Stripe guide walks you through it step by step.
Charging at the time of booking reduces last-minute cancellations and fake bookings.
Step 5: Paste it into your website
There are three ways to publish it:
- Embedded widget: the calendar and prices are always visible inside your page. This is the option that converts best.
- Floating button: a button in the corner that opens the widget from any page.
- Full page: a link ready to share on social media, WhatsApp or your Google Business Profile.
It works with WordPress, Wix, Squarespace or any site where you can paste code. The Install the widget on your website guide explains where to paste it on each platform.
Then: manage your bookings
Once bookings start coming in, there are also guides for confirming, editing and cancelling them and for connecting them to your other systems, one for each module.
Start today
An OTA brings you new customers. Your website is where the ones who already know you stay. A good booking widget is the difference between "send us a message" and "book now".
Visit the Help Center or create your free account and publish your widget today.