You can match the widget's colors and font to your brand. Changes apply right away on your site: you don't need to copy the code again.
Where to change it
- Tours, Hotels, Rentals, Restaurants and Attractions: in the module's menu, Widget design. The design applies to all your tours (or hotels, properties…) in that module.
- Transportation: each widget has its own design. Go to Widgets, click Configure on the widget and use the Appearance section.
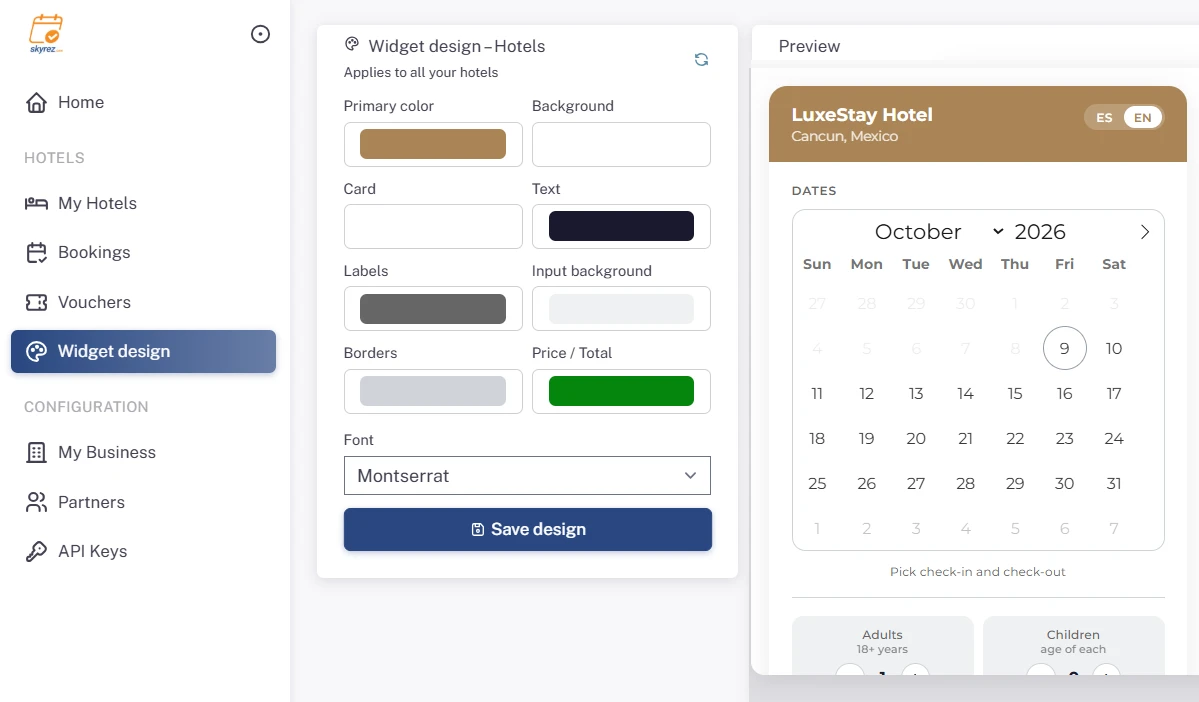
1. Pick the colors
- Primary color: buttons and highlighted elements. Use your brand's main color.
- Background and Card: the widget's background and its boxes.
- Text and Labels: the color of the text and of each field's title.
- Input background and Borders: the fields where the customer types.
- Price / Total: the color of the prices.
Check the Preview as you change the colors.
Make sure the text is easy to read on the background. If you don't like a color, Reset to default values brings everything back to the original design.
2. Pick the font
Under Font you can keep the system font or choose one from the list. If your site uses a similar font, the widget will blend in better.
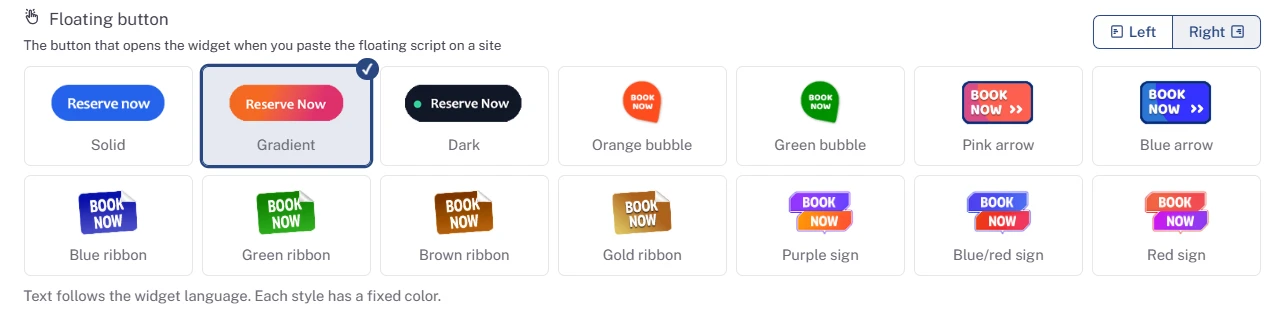
3. Pick the floating button
Under Floating button choose one of the predesigned styles and its Button position (left or right). It's only used if you pasted the floating button code on your site. The button text follows the language of the code you copied.
4. Save
Click Save design (in Transportation, Save appearance). Reload your site to see the change.
Was this article helpful?
Questions? [email protected]