In the Attractions module you sell admission tickets for museums, aquariums, parks and similar places. First you create the attraction, then its ticket categories (General, Child, Resident…) and finally its time slots with capacity.
Create the attraction
1. Open My Attractions
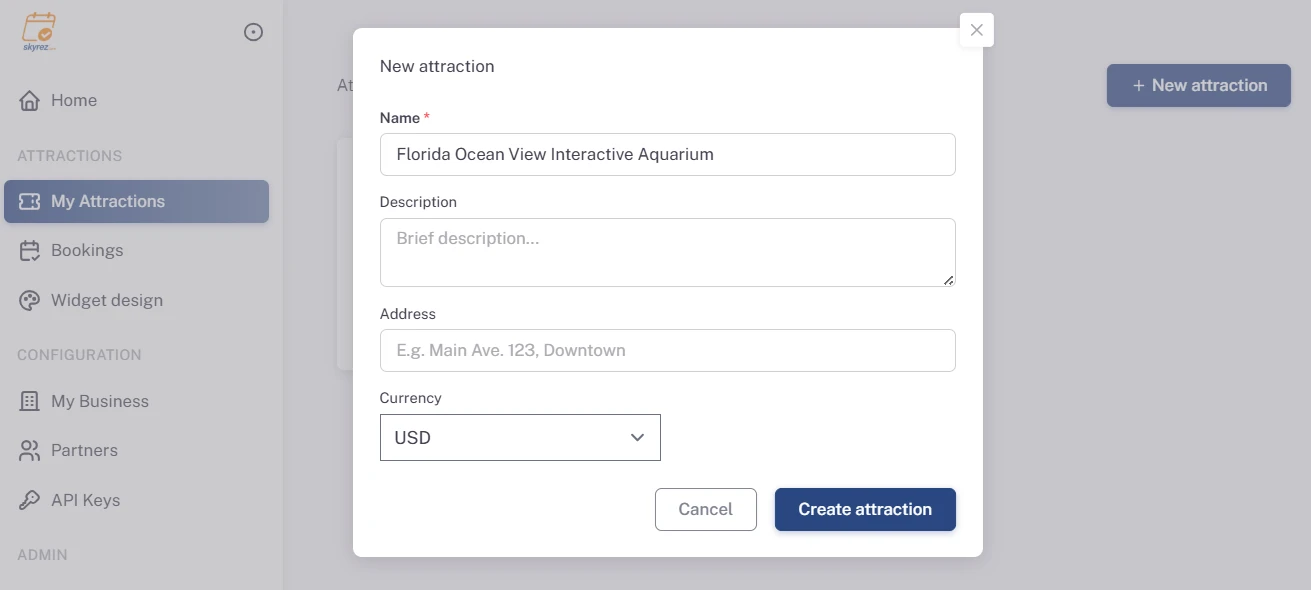
Go to the Attractions module, click My Attractions and then New attraction.
2. Fill in the details
Enter the Name (for example "Mayan Museum"), a short description, the address and the Currency you sell in. Click Create attraction.
3. Check the information and upload the logo
In the list, click Configure. In the Information & settings tab make sure the Status is Active and upload the Attraction logo: it appears in the widget and in the email with the tickets.
4. Upload the photos
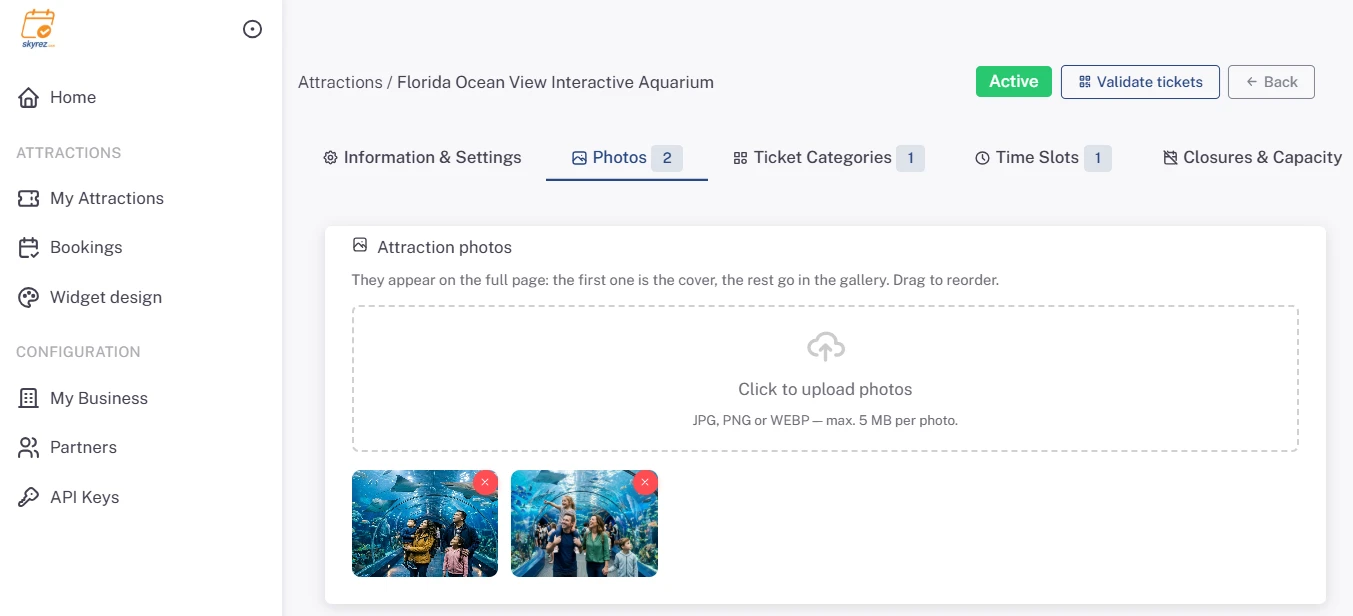
In the Photos tab, upload the attraction's photos (JPG, PNG or WEBP up to 5 MB) and drag them to reorder. The first one is the cover of the full page and the rest make up the gallery.
Create the ticket categories
5. Add a category
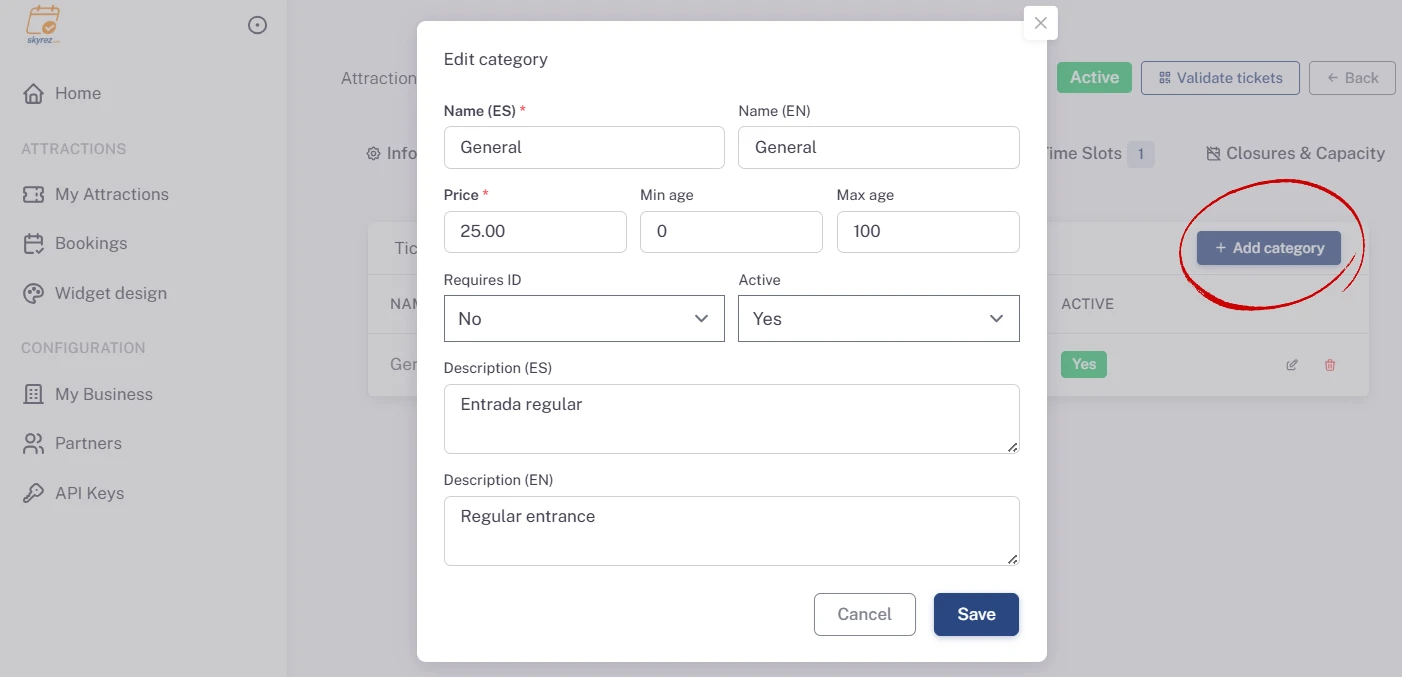
In the Ticket categories tab, click Add category and fill in:
- Name (ES) and Name (EN): for example "General" / "General admission".
- Price of the ticket.
- Min age and Max age (optional): for categories like "Child", ages 3 to 12.
- Requires ID: check it for tickets like "Resident" or "Student".
- Description (ES) and Description (EN) (optional): a short detail about the ticket.
Save it and repeat for each ticket type.
In the widget, under each ticket's name and price, guests see its conditions (for example "Ages 3–12 · ID required") and the description. The conditions also appear on each ticket in the PDF, so they can be checked at the entrance.
Next step
Set when people can visit and how many fit: Time slots, capacity and closures.
Install the widget
In the Widget tab choose the Widget language and copy what you prefer:
- Full page (with photos and gallery): a link ready to share or use as your booking page.
- Widget embedded in your page (recommended): date, times and tickets always visible.
- Floating button: a button in the corner that opens the same widget.
Paste the code into your website. If you're not sure where, see Install the widget on your website.