The widget is the booking form you place on your website. You add one or more routes to it, each with the rate set you want to show.
You need at least one route with zones and rates. See Create your route and its zones and Set up your rates.
1. Create the widget
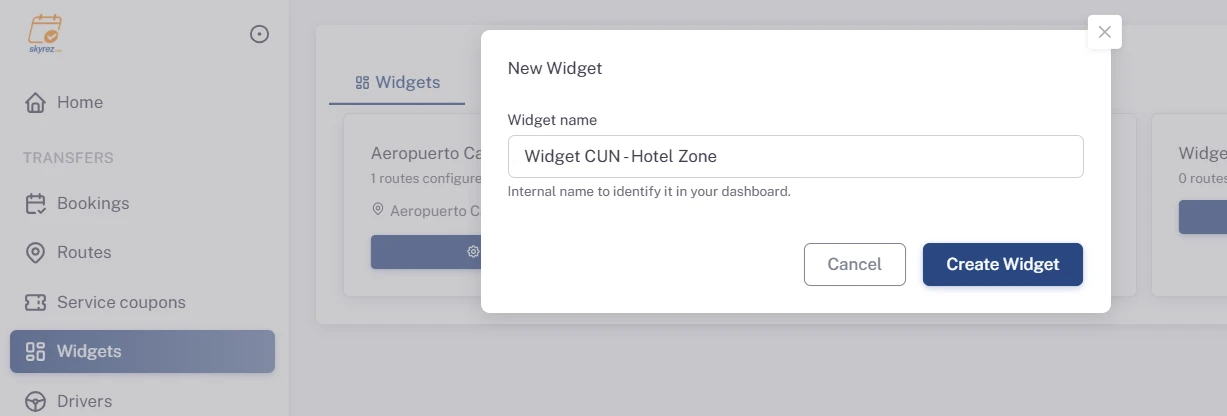
In the Transportation module, click Widgets and then New Widget. Enter a Widget name to identify it in your dashboard (for example, "CUN Widget – Hotel Zone") and click Create Widget.
2. Enter the notification emails
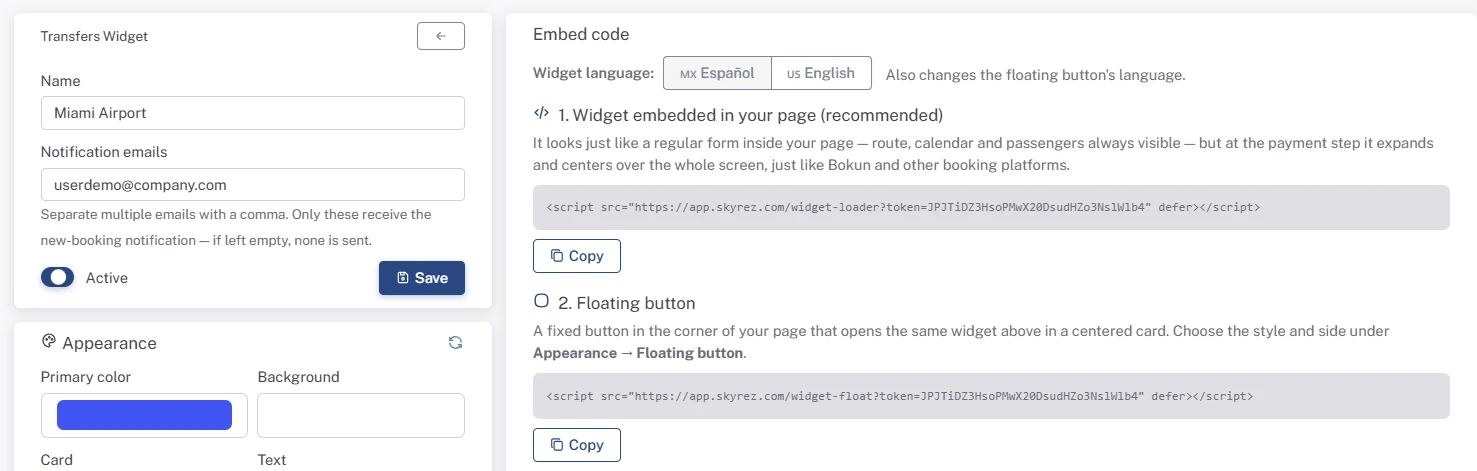
In the widget settings, under Notification emails, enter the email (or several, separated by commas) that should be notified of each new booking. Click Save.
Important: if you leave this field empty, no notification is sent when a booking comes in. You can always see them under Bookings.
3. Add your routes
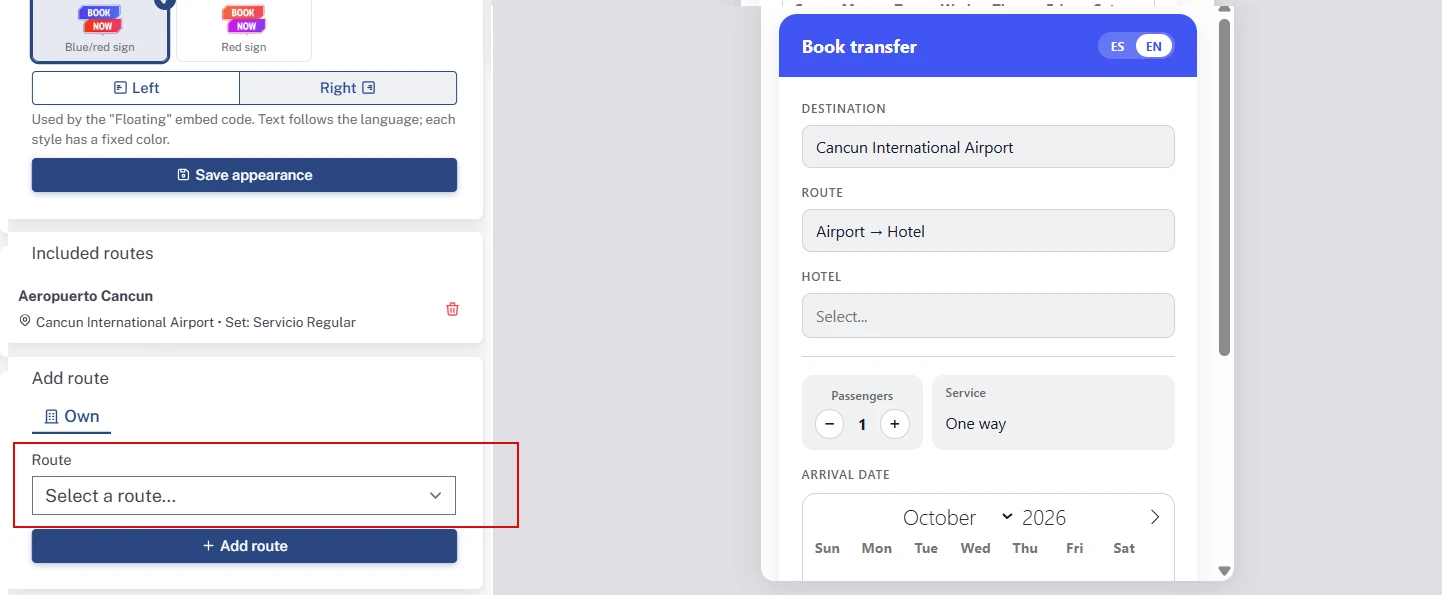
Under Included routes click Add route. On the own-route tab, choose the route and the Rate set your customers will see (usually your public rate). Click Add route.
You can add several routes to the same widget, for example from two airports.
4. Check the preview
On the right you'll see the widget Preview exactly as your customers will see it. Run a search to check zones and prices.
5. Adjust the appearance
Under Appearance choose the colors, font and floating button style. See Customize your widget's design.
6. Copy the code
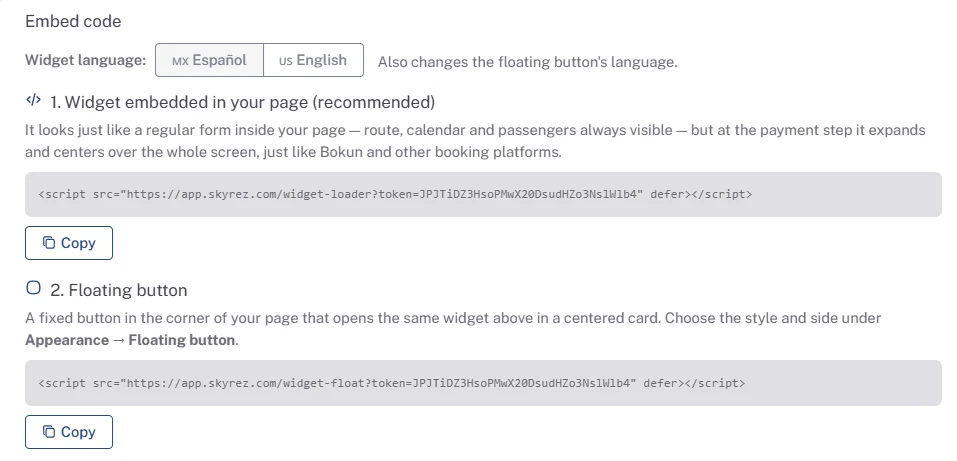
Under Embed code pick the language and copy the embedded widget or floating button code. See Install the widget on your website.
Booking pages (no code)
If you'd rather share a link than paste code, click New Page in Widgets. Enter an Internal name, an optional title for customers, and click Create Page. Then use Copy URL or View public page.
If you choose a business partner when creating the page, bookings made through it will be on credit for that partner, with no card payment.
Online payment
If Stripe is connected, the widget charges the card when booking. If not, it takes the booking without payment. See Connect your Stripe account.